Showing posts with label Work Box; Work Task; Adapted materials; Classroom setup; visuals. Show all posts

Tuesday, June 24, 2014

Work Boxes

Work Boxes: As mentioned multiple times in the past, I have a TON of work boxes.  Here are a few more:


Reading office supply sort: Random items from around the classroom are put into the container. Students read the label at the bottom of the sorting system and place the correct number of items!  So easy to setup, and FREE!


Filling Medicine Box:  I used small candies as the "pills".  Students got instructions on what "pills" were needed in AM/PM.  Have to fill out weekly medicine storage.

 
Item sort (similar shape edition):  In this task, students sort random items, but many have very similar shape, (rounded vs square edges).  Students sort accordingly.

 
Another shape sorter - this came as a math kit, I just dumped it into a work box!

Fine motor activity:  Students take the small pegs and push them into a piece of foam.


More to come in a few days!!!


Thursday, June 12, 2014

Work Boxes - Organizational Nightmare Solved

Ok, if you've read any of my previous posts, you know I have a problem.  I am addicted to work boxes.  It is an addiction, a true addiction.  I cannot go more than a few weeks at a time without a trip to the dollar store to purchase materials for my newest work box idea.  I love that these can be teaching tools, independent practice, and can encompass so many skills at one time.
When you are as addicted to creating these as I am, you end up with so many boxes that it can become an organizational nightmare.  How do you know what's in each box?  How do you know what to assign each student?  Here is how I do it!

First, I created a color coded system for the types of boxes I have.


This helps me put boxes that are similar together on a shelf.  Each shelf has a strip of tape on it so that I know where that color/type box goes for easy finding and easy returning.


Each box is then given a label.  I try to make these 1-2 words, but slightly descriptive so that I can quickly figure out what the task inside is.  This label also gets a color coded dot so we can tell what shelf it will belong on.


I then make a second label that I laminate and add velcro to.  This one goes on their job chart.

And there you have it.  This is the way that I organize my work boxes.  It works for me.  It can still be a little overwhelming, but my kids have always been able to find their assigned boxes independently and are able to return boxes when necessary!

How do you organize and assign work boxes to your kiddos?


Saturday, October 27, 2012

Work Box Weekend

Ok, so I've been absent from posting for the past week.  It has been one of those weeks.  The type where you go to school at 6AM and leave at 7PM and still don't get all that you need done.  I've had a kid testing the limits and tantruming for HOURS, parent conferences, grades due, IEP updates due, etc, etc, etc.  BUT, the week has ended and I'm getting back on track.
Here are some more work boxes to get me back in the posting routine!

Button Practice - I have two students who have buttoning/unbuttoning objectives.  I cut the waist band out of a few pairs of mens pants with the various types of buttons that these students wear.  The students have to put the pants around their waist and button them, then show me, then unbutton and put back in the box.  It has helped them tremendously!  (I forgot to take a picture of the actual box)


Animal Match - Students match small animal toys to pictures of the animals.


Folding T-Shirts - Last year, my husband gave me the best Christmas present EVER. . . a flipfold board for folding t-shirts. This is great for ALL kids and creates a perfectly folded t-shirt!


 Spring Sort - Students create a package of items from Easter sales.  Includes an egg, a spinning top, a maze, a straw and a bunny straw holder.  No fancy template necessary - just a hand-drawn template which kids follow.


Candle Pack - Students package six candles into their packages.


Saturday, October 20, 2012

Work Box Weekend part 4

"How do you make all your work boxes?"  I get this question a lot from people who come into my classroom.  For me, making work boxes has become almost an obsession.  Everywhere I go, I look for things I can use in a box!  I am addicted to dollar stores and dollar sections of stores.  I love going to the hardware store and roaming the aisles.  I spend an inordinate amount of time looking at items and wondering, "did a person have anything to do with packaging/making/coallating that?"
Ok, so here's a picture of last weekend's dollar tree trip.  Actually, to be honest, this was trips to 3 different dollar trees.  Yes, you can visit 3 different dollar tree's in one day and yes, you can make purchases at all 3!!!  :)
As you can see, I purchased a wide array of items.  I love, love, love the small containers with lids.  I use these as packaging containers in multiple boxes.  I got a few puzzles, which will go into our leisure section.  The bowling ball games became a color matching and packaging activity.  The pencil erasers, grips and sharpeners went into a pencil assembly task.  The ice trays became a sorting activity.  The color pencils became a color pencil package activity.  The regular pencils (which are packaged as 5 each of  5 different colors) became a pencil package activity.  There are small beads in there that are used for a bead pattern activity.  The fall stickers are used for arts or for fine motor.
The way I choose tasks really depends on my kiddos at that time and my mood.  I try to look at items and think "is that something someone would ever have to package or make?"  Sometimes the answer is yes and I make sure to purchase that.  Sometimes the answer is no, but I know it can address some target skills (following a template, following written directions, counting, fine motor, etc) sos I purchase that.  Sometimes it is no, but it's just pretty, so I either purchase if I'm feeling the addiction, or I skip it!  :)

Here are pictures of some of the finished boxes I made from the above materials.  

 
 Pencil Pack - Students package 20 pencils into a box.  Higher kiddos can follow the visual above and kiddos who need a little more support follow the visual to the left.


 Color Pencil Pack - Students follow the visual cue card to package one of each color into their box.

Bowling Pack - Students follow the template to package a mini bowling ball set


Color Pack - Students follow the color template to place pom poms into a small container with lid.


Bead Pattern - Students follow the picture cue to put beads on in a certain pattern.


Thursday, October 18, 2012

Student Rotations - Work with Teacher

It has been a very long day.  I had a student who basically stayed in tantrum mode for 5 of our 8 hours!  He is new to my class, so he truly didn't believe I would hold firm in my expectations of him.  Thank goodness, I did.  It was hard at about hour 4, but we made it and I expect a shorter tantrum tomorrow!

Anyway, this tantrum kind of zapped my brain cells.  I want to post this, but don't feel my writing will be especially clear.  Please forgive me if I ramble or don't make sense!

Ok, here goes.  In my class, we have student rotations that include independent work, work drawers (a set of 6 individualized activities), Vocational, Computer/Ipad, leisure, and group.  I plan to show you each of these stations in different posts.  Today I will focus on our Work with Teacher station.  This is where I try to work 1:1 or 1:2 with students on specific objectives and where the most data is taken.

An overview (this is a very messy picture, I took it after school while I was using the table to organize and create materials) - there is a kidney table where I sit with the students.  The whiteboard houses visuals and is used to write prompts, notes for things I need to create, etc.  Behind the table is a small bookshelf where I keep each child's IEP box.  To the left of that is a drawer system where materials are kept that I use for multiple students.


This is the shelf behind the table.  On it I keep each student's IEP box and then general items that I may need to use with kids.  IEP boxes hold materials that target specific IEP objectives.


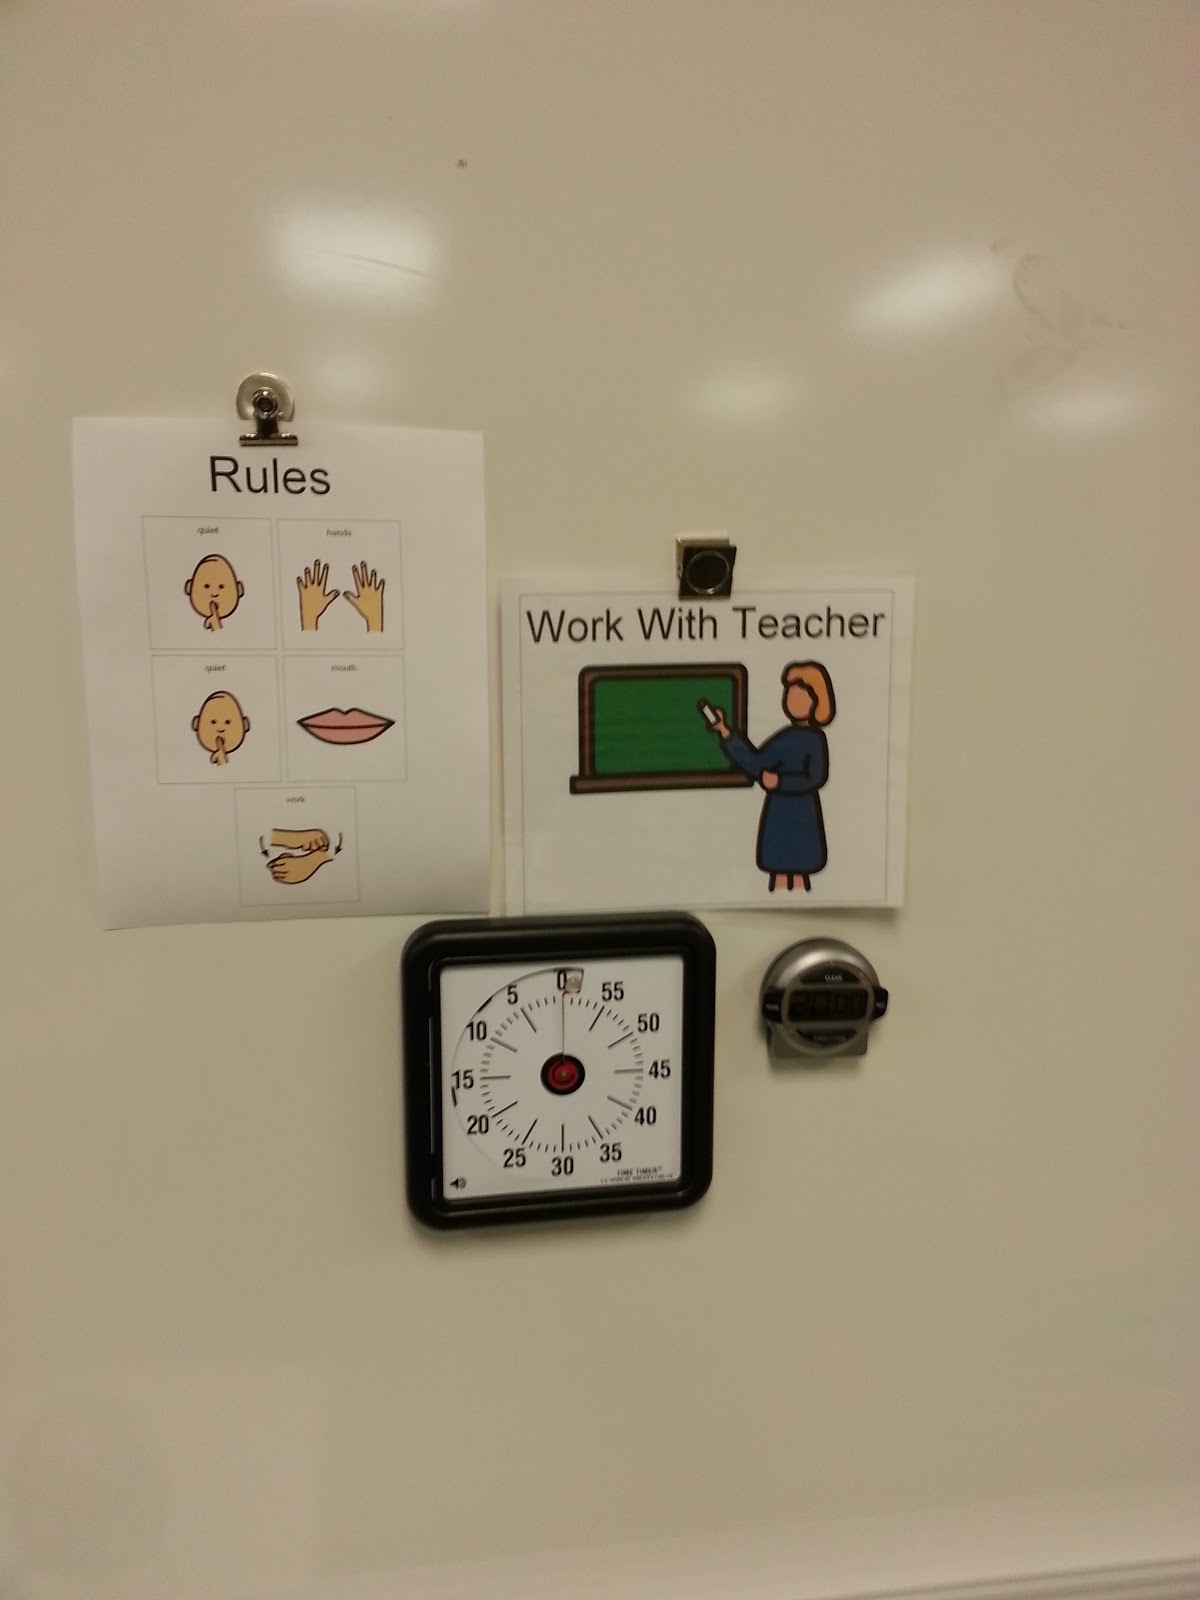
These are the visuals that are located on the white board behind the table.  There is a visual timer, along with a second timer which I can actually hear.  The rules are also posted.


Here is what I keep in the drawers:

Commonly used environmental print cards, noun picture cards and color sorting cards.

Visuals for administering the ABLLS (from http://www.trackingsheets.net/) and some edible reinforcers.

Photo cards for receptive discrimination and identifying common objects.

Paper of all sorts and writing utensils.


Flash cards and games that can be played as a small group.

Maps and other items for Social Studies.


Now for the IEP boxes:


This is one student IEP box.  It contains all items I will need to use during our time together.


One task in the box is an object to picture match.  Real photos are used to match to items.

This is another student's IEP box.

One task in this IEP box is practicing following prepositional directions.  I use a sentence strip and a cup to model the correct response.

That is a quick look at my "work with teacher" area.  There are a ton of other things I do during this time, but these are the major components.  Very efficient and easy to use!

Wednesday, October 17, 2012

Classroom Essentials

Do you have items in your classroom that you have no idea how you ever lived without???  I have tons of them.  However, a few top the list.
Here is my teacher work station:

My essentials include:
Laminator - possibly the most useful thing I've ever purchased.  I remember purchasing my first one of these about 12 years ago. . . you had to use a film (almost like clear contact paper) and cranked the paper through the film - it took forever and rarely stuck!  Anyway, my school provides laminating but the laminate is very thin and doesn't hold up well to my kiddos repeated use.  This personal laminator came from Walmart and costs $28.00.  The film can be expensive, but I purchase a pack of 200 lamination pieces for $13.00 on Amazon.  It is much thicker than the laminate our school uses.  I laminate almost every thing that comes into my classroom!  I may have a slight addiction.


Velcro - I use velcro for EVERYTHING.  I use it for icons, PECS, behavior charts, adapted books, hanging items on walls, etc.  I swear, if it has space to put some velcro, I've put some velcro!  I am lucky to have landed in a school system this year that provides this for me.  I feel like I got a raise in this alone!!   


Binding Machine - Another perfect tool.  I purchased this from Office Max for about $30.00.  I use it to bind adapted books, add a page at the end of a book to keep icons (stolen from Sasha over at the Autism Helper - http://theautismhelper.com/freebie-friday-bugging-you/) and create student workbooks.


Paper Cutter - I got a "needs improvement" in two subjects in elementary school - Handwriting and Using Scissors!  This made my OCD brain freak out because all my icons were crooked!  My paper cutter has been a life saver! It can cut up to 10 pages at a time and is safe to keep around kids.  The blade is underneath and cannot cut a finger, even if you try!  I have an X-Acto brand and I cannot find another ANYWHERE!!!  Pictured above is a different brand, but I think it works great too.


Double Sided Tape - This is used to keep icons and papers in place when they are going through the laminator.  This keeps them from sliding around and overlapping.


Packing Tape - I use this for almost everything.  It can be laminate in a pinch.  I use it to fix up icons that have been over-used.  


Ok, that's my essentials.  What am I missing?  What do you just have to have in your room?